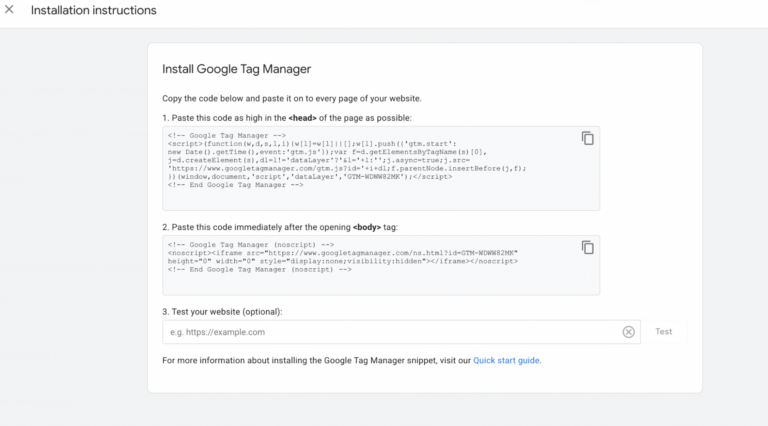
To install Google Tag Manager (GTM) on Shopify, paste GTM’s two snippets into your theme.liquid, the <head> snippet just before </head>, and the <body> snippet right after the closing </body> tag.
How Do You Install Google Tag Manager on Shopify
1. Create Your GTM Container
Sign in toGoogle Tag Managerand create a Web container for your Shopify store. GTM generates two JavaScript snippets — keep this tab open.
2. Add Snippets to theme.liquid
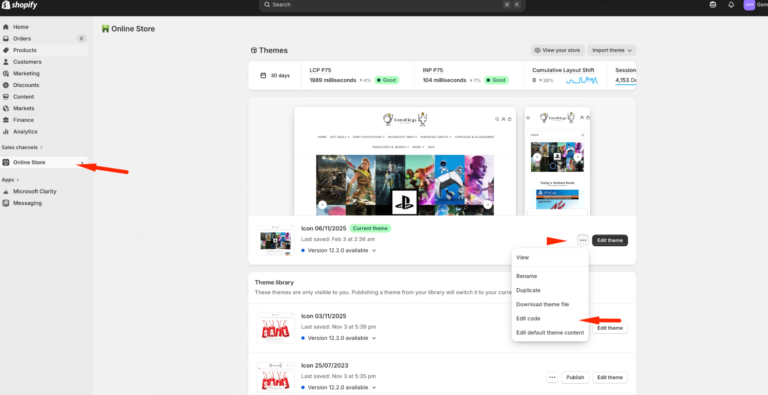
In Shopify Admin: Online Store → Themes → Edit Code → look for “theme.liquid”
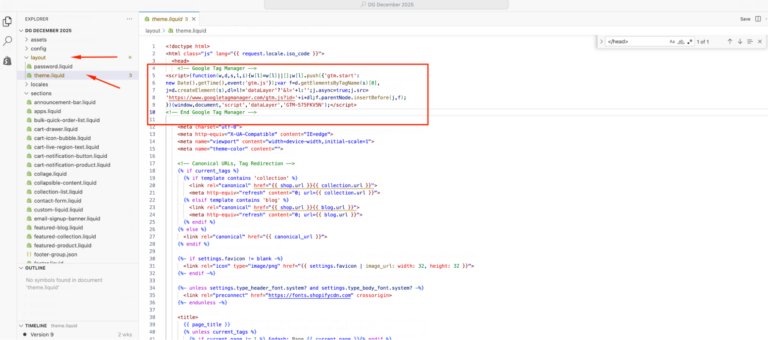
<head> snippet: paste the head snippet near the top before the closing </head> tag.
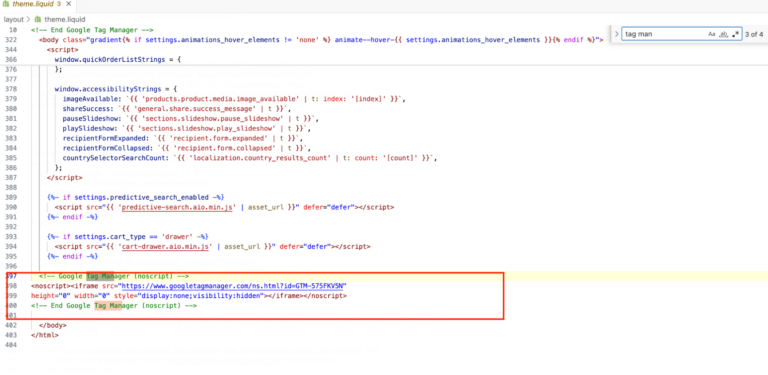
<body> snippet: insert the body snippet immediately before the closing</body>. Save your changes.
3. Checkout Tracking — test your website
Once the two snippets are copy and pasted to its designated place. Test it out on GTM if its properly installed via pasting your homepage URL. If you see check mark means snippets are installed properly, if x mark double check where you pasted the snippet or wait less than 5 mins to sync in with your shopify system.
4. Configure Tags & Triggers
Once your GTM container is installed in your shopify, you can set up essential tags such as a GA4 configuration tag for site-wide tracking, event tags for actions like add_to_cart or purchase, and a conversion linker if you’re running Google Ads. All these can be triggered based on conditions you define in GTM, using the dataLayer to pass event data.
GA4 Configuration tag: fires on all storefront pages.
Event tags: add_to_cart, begin_checkout, purchase (pushed via dataLayer). Pair this with Schema Markup so AI engines can read your product and event data cleanly.
Third-party pixels: Meta, TikTok, Pinterest. GTM is still the best central manager for non-Google tags.
Conversion Linker: required if running Google Ads.
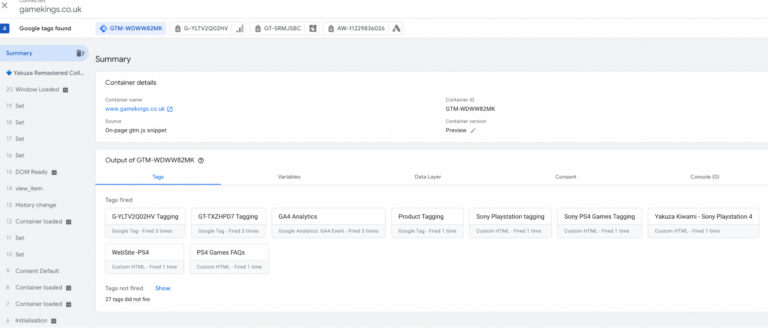
5. Test, Then Publish
Before publishing your changes, use GTM’s Preview Mode to check if your tags are firing correctly on the intended pages. The Google Tag Assistant Chrome extension can also help verify implementation. Test on product pages, the shopping cart, and the thank-you page to ensure that all relevant events are captured accurately.
Is GTM Still the Right Choice for Shopify
By installing GTM on your Shopify store, you gain a flexible, scalable, and future-ready tracking setup. You can adapt quickly to new marketing trends, optimize your campaigns with precision, and maintain a fast-loading, smoothly running online store. With the right configuration and regular maintenance, GTM becomes not just a tool for tracking but a central hub for your e-commerce analytics strategy.
If you need help setting up GTM, troubleshooting a broken dataLayer, or diagnosing tracking discrepancies, here at Searchlight London we can guide you through the process to ensure your store’s analytics remain accurate and actionable. Our technical SEOteam audits your full tag setup, migrates legacy checkout scripts to Custom Pixels, and ensures your dataLayer is clean and AEO-ready. If you need help getting your Shopify store’s tracking right before the deadline.